Tools Required:
- clear ink such as Versamark by Tsukineko
- palette style soft chalks
- cotton ball, cotton-tip swab or other chalk applicator
- image of your choice
- Ink up your stamp with clear ink and stamp your image.
- Let the ink dry slightly, then take your chalk applicator (and coloured chalk) and gently pat chalk over the image.
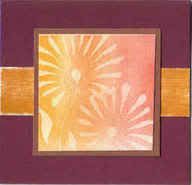 Stamp credit: Close To My Heart
Tips:
Stamp credit: Close To My Heart
Tips:
- If you get chalk where you don't want it - you can simply use a chalk eraser to correct your mistake.
- If placing chalk-popped items in your scrapbook, you should first 'set' the chalk so that it doesn't rub off on the page protector. To set the chalk, place a plain piece of copy paper over the image and rub your hand (not the paper!) back and forth over the image. The copy paper will 'pick up' any stray chalk dust that is sitting on top of your image.

