This is such an easy, yet effective technique to create soft, subtle shading. Tools Required:
- Stamped Image
- Watercolour Pencils
- Blending Pen
How-To:
1. Stamp your image onto cardstock.
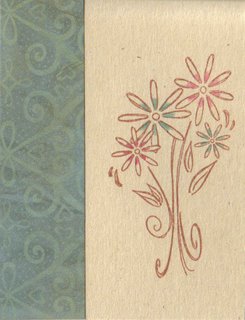
2. Using your watercolour pencils, add a touch of colour to the desired areas of your stamped image. Keep in mind that this colour will be blended in the next step to fill in more of the shape, so you should add your colour in areas that you wish to have 'darker' or more saturated colour when all is complete. It is helpful to visualize a light source and place your colour in areas that would naturally appear darker if you wish to achieve a realistic look. In this photo, I have added the colour towards the centre of the flowers.
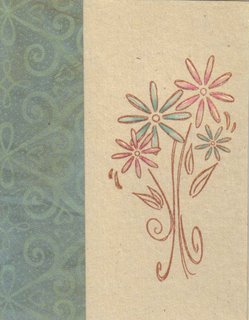
3. Using your blender pen.....pull the colour you added in step 2 outward to fill the rest of the shape. Don't use a back and forth motion - simply 'pull' the colour in one direction towards the area that you want coloured, but to appear lighter. See sample below.
4. Simply continue adding colour to your image as desired, then finish your card.
Tips:
- The same basic process can be done using a Waterbrush or Aquapainter type tool. The end result is even more like a watercolour painting. If you opt to use a waterbrush, I suggest stamping your image in a waterproof ink like Stazon to ensure the outline colour doesn't blend as well.
- If you emboss your main image first, the fill in with watercolour pencils and a waterbrush - the result will look much like a stained glass window.
- When colouring small areas, be sure to use the fine point of your blender pen (it is dual-tipped), you will have much better control.
If you have a watercolour art piece that you'd like to share - email me a pic or a scan and I'll post it here on my blog!
Have Fun!

